LIQUID MUSIC USER MANUAL
Voice Layer
The Voices tab might have a cool and enigmatic name, but it’s actually useful for a variety of highly common things in Liquid Music! Some examples of things you can do with the Voices panel:
- Set the number of simultaneous notes in a chord.
- Set the size and style for the Arpeggiator.
- Filter notes out of the arranger based on their rhythmic location.
- Add chord stabs to an arpeggiation pattern .
The following sections will discuss each panel in the Voices tab in greater detail.
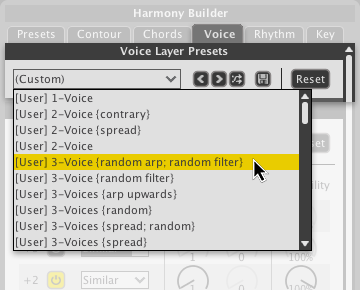
9.1 Voice Layer Presets
Use the Voice Layer Presets to quickly load settings into the entire Voice tab.
- Drop-down menu: Contains presets; click to load them.
- Arrows: Cycle through the presets in the list.
- Scramble: Randomly select a preset from the Layer Preset list.
- Save: Save the current settings in the Voice tab as a Layer Preset; a window will appear prompting your to title your preset before saving it.
- Reset: Restore the entire tab to default values.
9.2 Voice Control
Use the settings in the Voice Control panel to add or remove a voice from the Arranger, change the behaviour of a voice when you sketch a melody, or apply a random possibility that a voice will play in the first place.
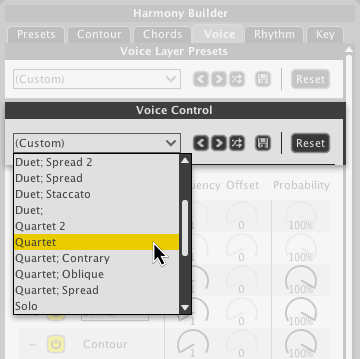
9.2.1 Presets
The Voice Control panel has its own set of presets useful for hot-swapping voicing settings while maintaining an arpeggiation or filter pattern. The controls are identical to those found in the Voice Layer Presets:
9.2.2 Voice
When you sketch a melody, how many simultaneous (or harmonic) notes appear in the Arranger is determined using the Voice buttons in the Voice Control panel. The central voice, denoted simply by a “–”, is the voice that most closely follows what you draw. Think of the other voices as occurring either above or below the central voice (hence the +/- in the naming scheme).
- Click a power button to activate a voice.

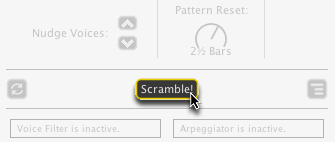
9.2.3 Nudge Voices
You can move the central voice to allow more notes above or below it by clicking the nudge voices button. In the example below, the central voice has been nudged all the way to the top to allow 8 voices beneath it:
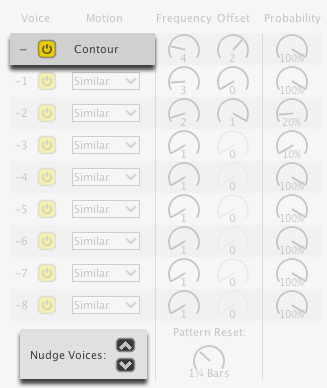
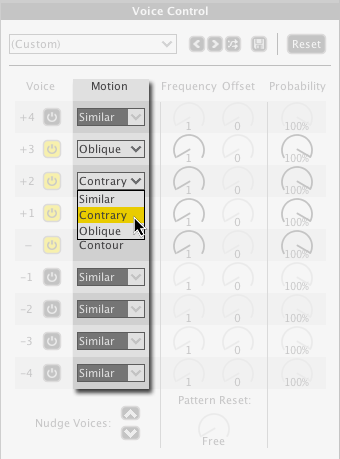
9.2.4 Motion
When you have multiple voices activated, you can get some pretty sweet musical results by changing the motion of one or more voice(s). For example, you can have one voice move the opposite direction when you sketch, or have a voice play the same note while other voices move around it. The options are:
- Similar: The voice moves in sync with your sketch.
- Contrary: The voice moves the opposite direction of your sketch, for example you draw up, contrary goes down.
- Oblique: The voice moves in a straight line regardless of how you sketch. Note that oblique voices always play a note in the chord in the track above.
9.2.5 Frequency / Offset / Pattern Reset
The Frequency knob sets how often a voice registers a note on the arranger. For example:

Notice how the highlighted notes occur on every 2nd note with the Frequency knob on 2.
- Click a Frequency knob and drag up or down to change its value.
The Offset knob becomes active when you increase the frequency value. It moves the starting point of the associated voice. Experiment with both the Frequency and Offset knobs to get interesting and staggered textures. For example:

Notice how the highlighted notes have shifted over by 1 note.
- Click an Offset knob and drag up or down to change its value.
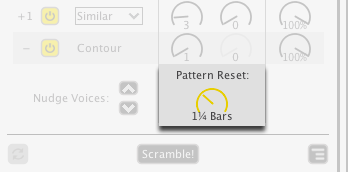
The Pattern Reset knob restarts the Frequency count for the knobs above. Once you have some settings dialed into the Frequency and Offset knobs, change the Pattern Reset to see what kind of variations you can create.
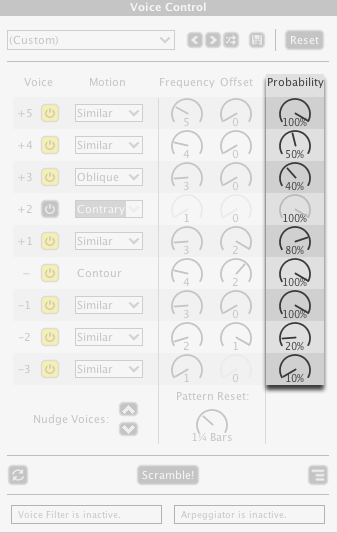
9.2.6 Probability
These knobs reduce the probability of a note occurring in a corresponding voice. Use them to thin out the arrangement in a random / methodical hybrid workflow: You choose the voice to thin out, Liquid Music randomly removes notes.
- Click-and-drag a knob up or down to change its value.
9.2.7 Re-Apply Settings
Any parameters with a random element–like the Probability knobs–can be re-applied to the notes in the Arranger using the Re-Apply button.
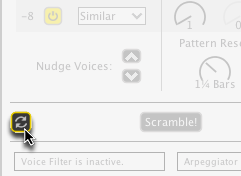
9.2.8 Scramble!
Click the Scramble! button to randomize the entire Voice Control panel. It’s a great way to jump between disparate settings and see what the panel can do.
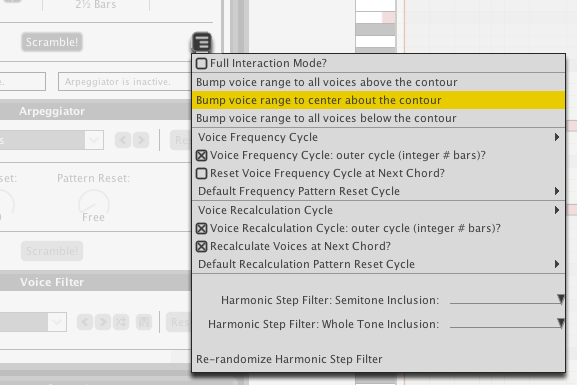
9.2.9 Voice Control Options
Click the options button to reveal a menu with some more controls:
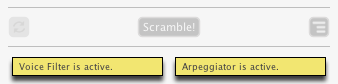
9.2.10 Voice Filter and Arpeggiator Active Indicators
Activating the Arpeggiator or Voice Filters overrides certain controls in the Voice Control panel and effects the placement of notes in the Arranger. For this reason, there are indicators at the bottom of the Voice Control panel.
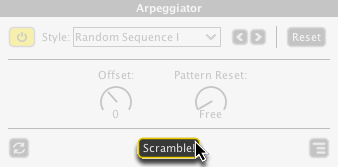
9.3 Arpeggiator
The Arpeggiator takes all the notes in a chord and plays them back to you melodically–meaning one note at a time. This is a great for creating melodies based solely on the notes in a chord, or for creating textured accompaniment using a synthesizer.
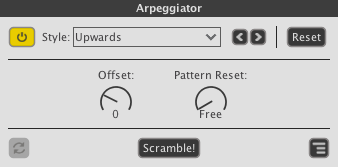
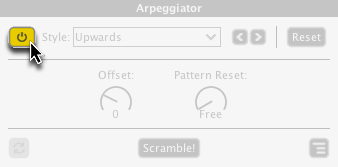
9.3.1 Turn on the Arpeggiator
Click the power button to activate the Arpeggiator.
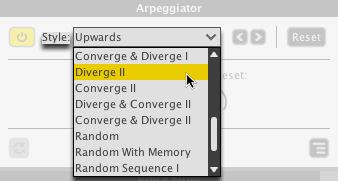
9.3.2 Arpeggiator Styles
There are a number of patterns built into the Arpeggiator.
- Click the drop-down menu to access the full list; we recommend you test them all!
- Click the arrow buttons to cycle through the items in the dropdown menu.
9.3.3 Reset the Arpeggiator
Press the Reset button to restore the Arpeggiator settings to default.
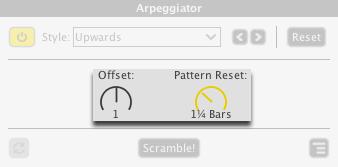
9.3.4 Offset / Pattern Reset
TODO this section only covers one of the Arpeggiator reset modes, we have 3
- Change the Offset value to begin the Arpeggiator pattern from a different spot in the pattern
- Use the Pattern Reset knob to restart the Arpeggiator pattern after a specified length.
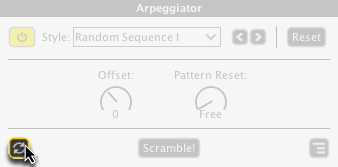
9.3.5 Re-Apply
Some of the patterns in the Arpeggiator Style list contain a random element. Click the Re-Apply button to get a new result for those patterns.
Note that the Re-Apply button is greyed-out if there is no random element to the arpeggiator pattern selected.
9.3.6 Scramble!
Click the Scramble! button to randomize the entire Arpeggiator panel. Roll the dice, ya know? Live a little.
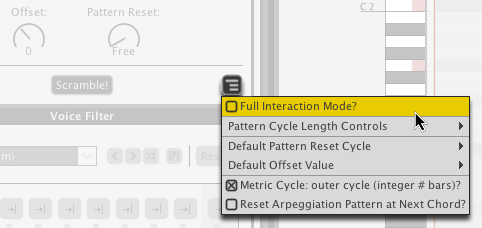
9.3.7 Arpeggiator Options
Click the Options button in the Arpeggiator panel to check out some fine tuning features. Personal favorites include deeper controls for the pattern reset behaviour. It’s cool; you should check it out!
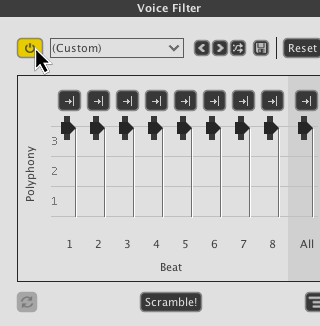
9.4 Voice Filter
There are two ways the Voice Filter works:
- The Voice Filter reduces the amount of simultaneous voices that can occur in the arranger. If something you’re working on is feeling very dense, you can use the Voice Filter to intelligently thin out the overall sound.
- When paired with the Arpeggiator, the Voice Filter behaves differently: It becomes additive in that it adds notes to arpeggiator patterns to create chord stabs and syncopated effects.
Both modes will be discussed in this section.
- Click the Power button to activate the Voice Filter
9.4.1 Voice Filter Presets
Use the Voice Filter Presets to get going quickly.
- Drop-down menu: Contains presets; click to load one.
- Arrows: Cycle through the presets in the list.
- Scramble: Randomly select a preset in the list.
- Save: Store the current settings in the Voice Filter as a new preset; a new window will appear where you can name your preset.
- Reset: Restore the Voice Filter panel to its default settings.
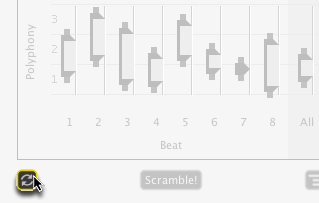
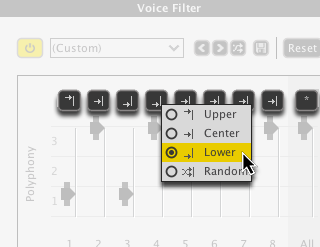
9.4.2 Polyphony Buttons
(With the Arpeggiator turned off)
The Polyphony buttons determine which notes will stay when you reduce a fader.
For example, if a button is set to “Upper”, the uppermost note(s) in a stack of notes will remain when you reduce the fader’s value. If a button is set to “Lower”, the lowermost note(s) will remain.
(With the Arpeggiator active)
The Polyphony buttons dictate where the added notes will appear. “Upper” indicates that notes will appear above the arpeggiator pattern, “Lower” indicates that notes will appear below the arpeggiator pattern. This is a great way to create syncopated chord shots in an arpeggiator pattern.
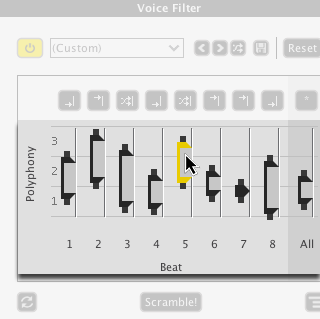
9.4.3 Polyphony Sliders
Click and drag the Polyphony Sliders (see Glossary) to either subtract or add notes to the arranger based on their rhythmic locations. See above to review the difference between the two modes.
- Click-and-drag a slider to change its value.
- Click-and-drag the handles on the outside of a slider to expand it. An expanded slider creates a range of values, any of which will be randomly selected.
9.4.4 Voice Filter Re-Apply
When you have expanded sliders (as in the image above), click the Re-Apply button to select a new value within each expanded region.