LIQUID MUSIC USER MANUAL
Rhythm Layer
There is no better way to get a new feel for something you’re working on than switching up the rhythm pattern (see Glossary). Liquid Music gives you that ability to the highest degree. Keep your chord progression and melody shape static while you cycle through various rhythm patterns. You can also use certain modules in this tab to add some articulation (see Glossary) effects. Use the presets we’ve created, or use our editing tools to create something new.
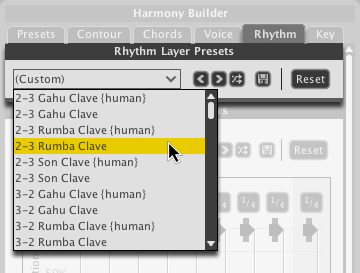
10.1 Rhythm Layer Presets
Click the Rhythm Layer Preset drop-down menu and select a preset to load a new rhythm pattern, change note durations, and switch up velocity and groove settings is to load a Rhythm Layer Preset.
- Drop-down menu: Contains presets; click to load one.
- Arrows: Click these two buttons to cycle through the presets in the adjacent drop-down menu.
- Scramble: Randomly selects a preset from the list.
- Save: Saves the settings in the entire Rhythm tab as a new preset; a new window will appear allowing you to title the preset appropriately.
- Reset: Restores the entire Rhythm tab to its default settings.
10.1.1 Rhythms in Liquid Music
The rhythm patterns you load using the Rhythm Layer Presets appear in the Rhythm Track that runs along the bottom of the arranger. By separating the melodic and rhythm elements of music into two distinct panels, you have a new dimension of creativity to explore. So enjoy, and be safe.
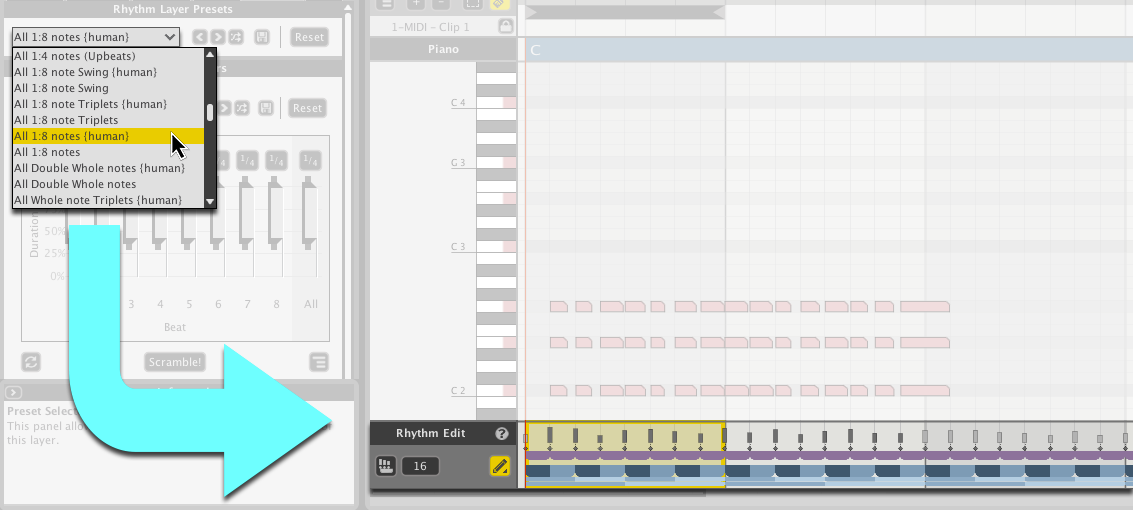
10.1.2 Rhythm Edit
You can manually edit and create rhythms using Liquid Music Rhythm Edit tools. Just draw directly onto the rhythm track.
- Click the Inline Edit Mode button to activate editing.

10.2 Duration Modifiers
The Duration Modifiers make macro-level adjustments to note lengths in the arranger. They work by targeting notes occurring in a particular rhythm location. Note that the Duration Modifiers are always on.
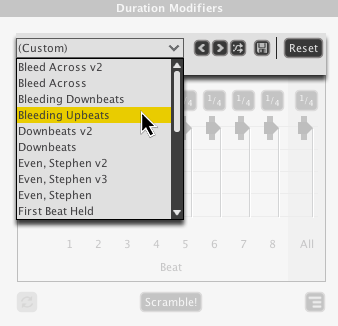
10.2.1 Presets
As with all the panel in Liquid Music, the Duration Modifiers features a list of presets you can load to get going quickly.
The controls are identical to those in the Rhythm Layer Presets:
- Drop-down menu: Contains presets; click to load one.
- Arrows: Click these two buttons to cycle through the presets in the adjacent drop-down menu.
- Scramble: Randomly selects a preset from the list.
- Save: Saves the settings in the Duration Modifiers panel as a new preset; a new window will appear allowing you to title the preset appropriately.
- Reset: Restores the Duration Modifiers panel to its default settings.
10.2.2 Duration Modifier Buttons
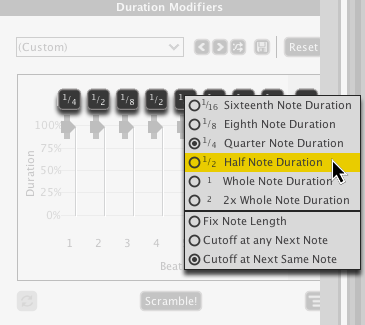
Use the Duration Modifier Buttons to set the length for a note occuring on a corresponding rhythmic location.
- Single-click a button to cycle lengths.
- Click-and-hold any button to reveal a drop-down menu with note lengths.
- The All button–the rightmost button–applies a note value to every slider in the panel.
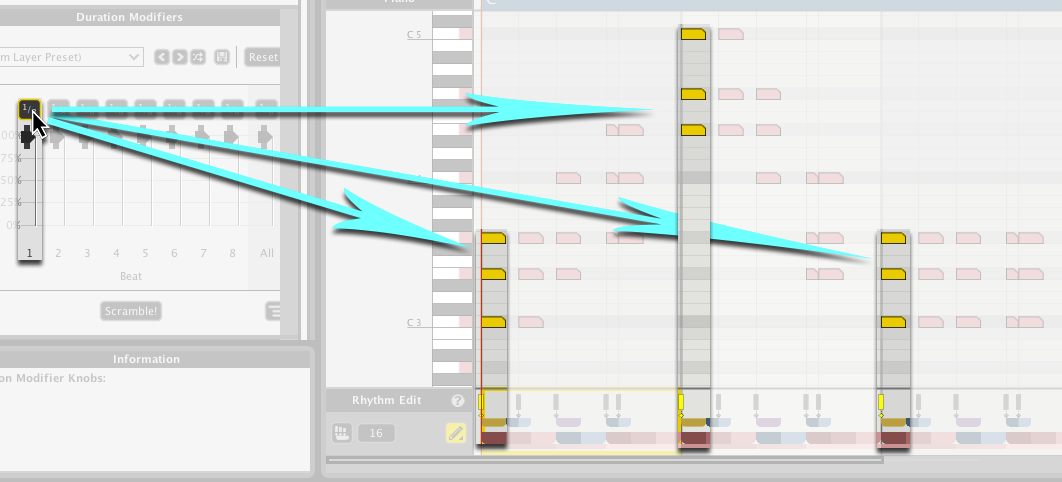
Hovering the cursor over a button (or slider for that matter) highlights the targeted notes in the arranger:
10.2.3 Duration Modifiers Sliders
Use the Duration Modifiers Sliders to reduce the length of notes based on a percentage value. For example, if you use the buttons above to set the note length to 1/2 notes, you can reduce the length of those by reducing the value of the slider.
You can also grab the handles on the outer portion of each slider to expand the slider. This adds a degree of variability to the results generated.

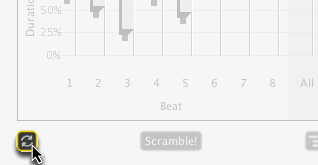
10.2.4 Re-Apply
Click the Re-Apply button to get new duration results based within the expanded regions in the sliders.
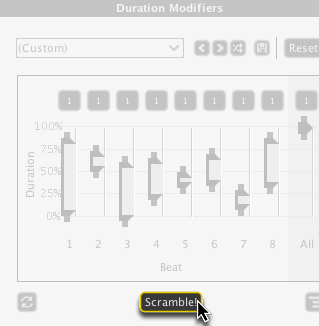
10.2.5 Duration Scramble!
Click the Scramble! button to randomize all the controls in the Duration Modifiers panel.
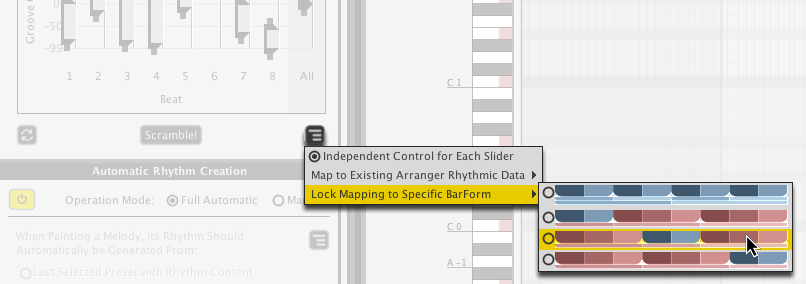
10.2.6 Duration Options
The Durations Options menu contains lots of customizing features. For example, change the slider scheme from eight individual sliders to three colour-coded sliders for greater macro control.
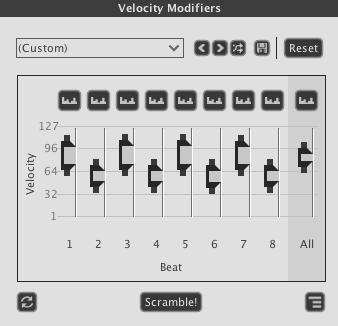
10.3 Velocity Modifiers
The Velocity Modifiers (see Glossary) give you large-scale control over the volume / dynamics (see Glossary) of the notes in the Arranger. The synthesizers you might be controlling with Liquid Music will likely respond well to varying dynamics: You might hear different sounds coming out of the same patch depending on whether the incoming note has a high velocity vs a low velocity. As such, this effect is great for creating a humanized and textured feel. Note that the Velocity Modifiers are always on.
Note that all the velocity values are displayed on the rhythm track that runs along the bottom of the arranger. They are the rectangular bars above the diamond-shaped notes:

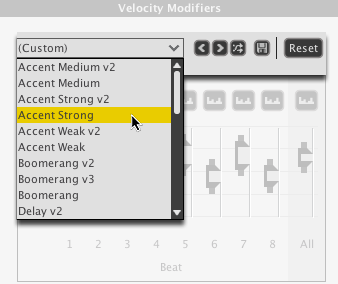
10.3.1 Velocity Modifiers Presets
Choose from a variety of velocity effect presets. Keep in mind that–as with all the transformation controls in Liquid Music–the Velocity Modifiers effect notes based on their location within a 4/4 bar.
The controls are identical to all preset controls.
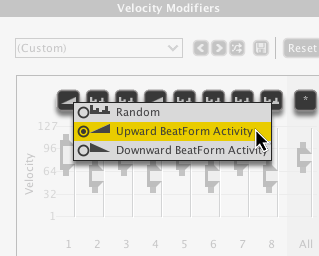
10.3.2 Velocity Modifier Buttons
The Velocity Modifier Buttons allow you to shape the velocity values created within an expanded slider. Paired with the “Random” shape, for example, this is a great way to create humanized (see Glossary) velocity. There are three possible values:
- Random
- Upward
- Downward
Click any button to cycle through the shapes. Click-and-hold a button to reveal a dropdown menu.
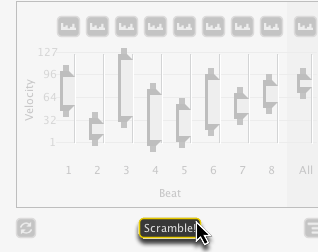
Use the buttons to create some familiar wave shapes like triangles, sawtooths, and reverse sawtooths. Here’s a triangle, for example:
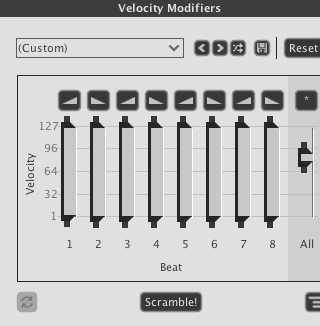
10.3.3 Velocity Modifiers Sliders
Click-and-drag a slider up or down to change its value. Click either of the outer handles on a slider and drag up or down to resize the slider.

10.3.4 Velocity Modifiers Re-Apply
Click the Re-Apply button to generate a new value within any expanded sliders’ range. Note that a Velocity Modifier’s Shaper Button needs to be set to Random to use this feature.
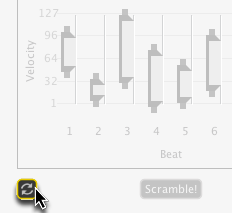
10.3.5 Velocity Modifiers Scramble!
Click the Scramble! button to randomize the entire Velocity Modifiers panel.
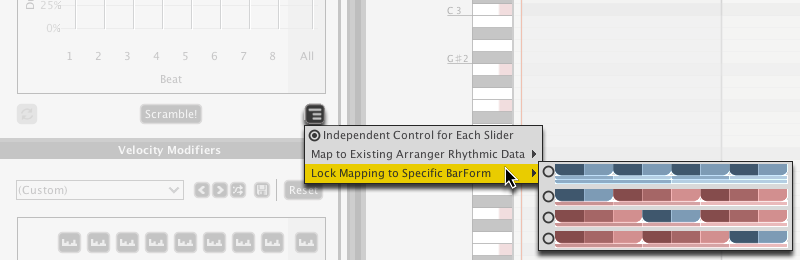
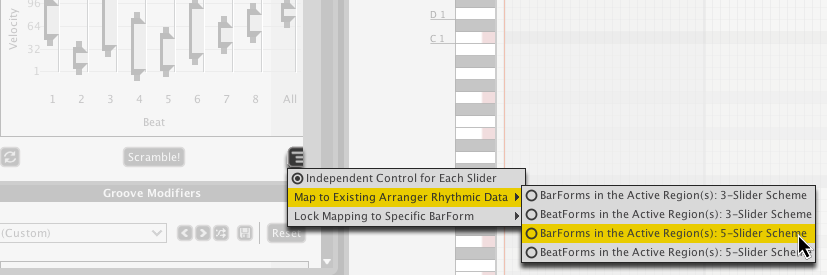
10.3.6 Velocity Modifiers Options
Click the Options menu button to reveal the Options menu. You can change the slider scheme, apply different color-coded patterns to the rhythms you’re working with and so on.
10.4 Groove Modifiers
Use the Groove Modifiers (see Glossary) to apply swing, stutter, anticipation, and glitch effects to the timing of the notes in the arranger. Note that the Groove Modifiers are always on.
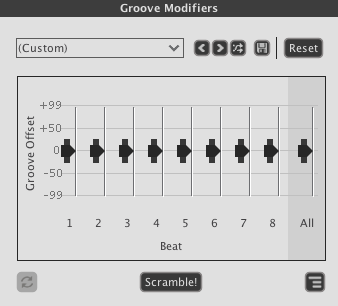
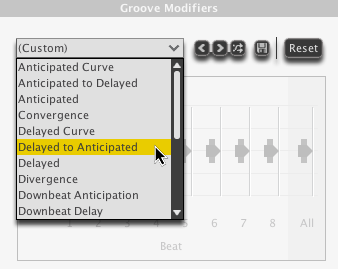
10.4.1 Groove Presets
Just because it’s electronic music doesn’t mean it needs to sound robotic. Load a Groove preset to hear what your quantized (see Glossary) and rigid idea sounds like with a bit of altered feel.
- Click a preset in the drop-down menu to load it.
All the navigation and panel controls are identical to the ones found in the layer presets.
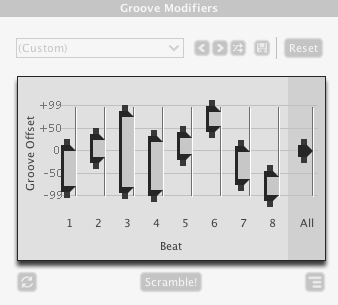
10.4.2 Groove Modifiers Sliders
The Groove Sliders are the main attraction of this here panel. Move them around, see how the notes in the arranger move around!
- Click-and-drag the sliders up or down to change their value.
- Click-and-drag the handles on the outside of a slider to expand it.
- The default groove position is in the center.
10.4.3 Groove Modifiers Re-Apply
Click the Re-Apply button to generate a new value within any expanded sliders’ range.
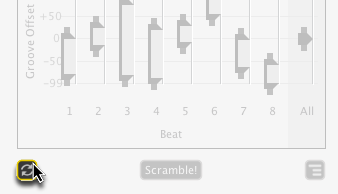
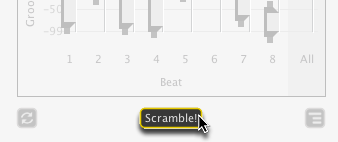
10.4.4 Groove Modifiers Scramble!
Click the Scramble! button to randomize the entire Groove Modifiers panel.
10.4.5 Groove Modifiers Options
Click the Options menu button to reveal the Options menu. You can change the slider scheme, apply different color-coded patterns to the rhythms you’re working with and so on.