LIQUID MUSIC USER MANUAL
Chords Layer
In Liquid Music, you can sequence chord progressions the same way you sequence rhythms, filter cuts, or envelopes in traditional synthesizers. We’ve created a lot of useful tools to help you build sweet and colourful progressions if you have no experience with chords, while satisfying anyone with thousands of hours of experience with a robust set of features.
8.1 Preface by Haig Beylerian
Learning music theory is a very rewarding endeavour. As you dive into music and chord theory, you will undoubtedly find many rich resources online. We encourage you to embrace these different approaches as they offer their own set of valuable perspectives.
Some personal favourites include:
The study of music theory will make you a better musician. That said–as a formally educated musician–let me emphasize the following: Always follow your ears above all rules and guides. Chances are, if something sounds great to you, it’s going to sound great to someone else. It would be a shame to scrap an original idea because it doesn’t follow the rules of traditional theory.
In Liquid Music, we’ve put a great deal of work into automating the rules of harmony for you. You can follow these rules and come to some awesome results, but they are far from being the only results you can get. Which is why we have also given you the freedom to roam outside the world of harmony that is “music theory approved”.
Music theory explains the music that has been, but not the music that will be. So learn the rules, but please break them.
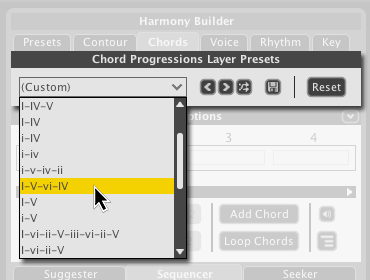
8.2 Chords Layer Presets
Use the Chords Layer Presets to quickly load an entire chord progression (see Glossary). All the chords are listed as Roman Numerals.
- Arrows: Scroll through the items in the preset list.
- Shuffle: Randomly selects a chord progression from the preset list.
- Save: Stores the current settings in the entire Chords panel. A new window will appear allowing you to title the preset.
- Reset: Restores the entire Chords panel to default.
8.3 Chord Overview
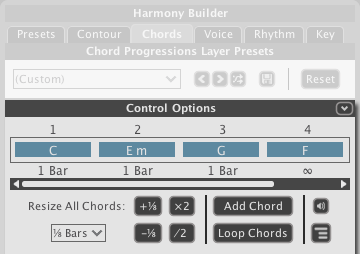
The Chord Overview panel lets you adjust the length and positioning of the chords in the arranger. This is perfect for adding some variety to how often and when your chords change.
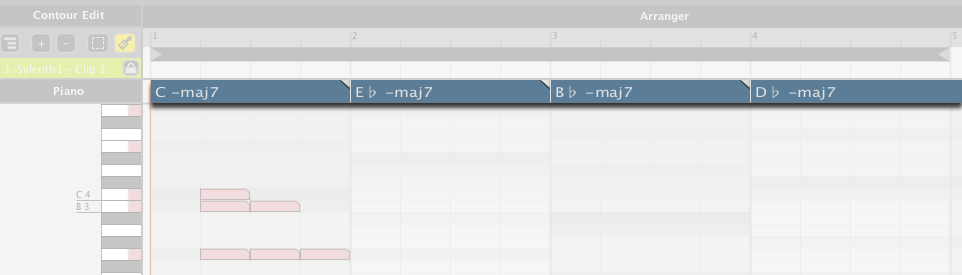
8.3.1 Chord Track
The edits you make to the lengths and positions of chords is directly reflected in the Chord Track. Every chord progression you create with the Chords panel directly informs the contents of the Chord Track above the Arranger. The Chord Track determines which notes can be drawn into the Arranger below. Think of it as a filter that only allows the notes of the chord through in.
There are a number of ways you can interact with the Chord Track directly:
- Click a chord to select it.
- Click the edge(s) of a chord and drag left or right to resize it.
- Right-click on a chord to reveal a drop-down menu; use it to resize, copy, or change the chord.
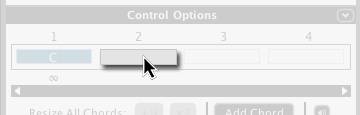
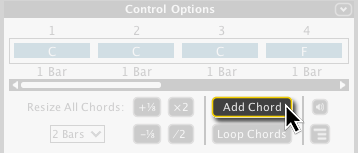
8.3.2 Add a Chord
There are two ways to add a chord using the Chord Overview panel.
- Click any blank chord slot to add a chord.
- The Chord Overview displays four chords at a time by default. If all four chord slots are active and there is no blank chord slot in view, scroll the Chord Navigator to the right until you find a blank chord slot.
- Click the Add Chord button. If there is no selection in the Chord Overview, pressing this button adds a chord to the end of the chord progression (see Glossary). The added chord will be the same as the chord immediately to the left of it.
- If there is a selection in the Chord Overview, pressing Add Chord inserts a chord directly to the right of the selection. The type of chord will be the same as the selection.
(images interspersed with text above, figure out how to do best)
8.3.3 Select a Chord
Click a chord to select it. This is useful in applying resize transformations.
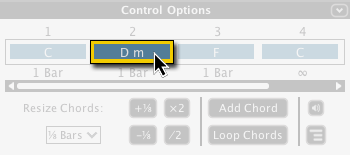
To deselect a chord:
- Press-and-hold [command]/[ctrl] and click the chord.
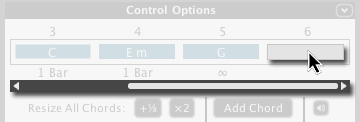
8.3.4 Resize Chords
There are a number of ways to resize chords.
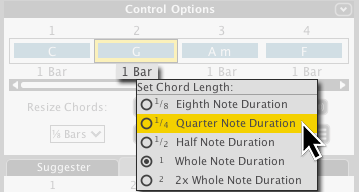
- Click the length beneath any chord to resize it.
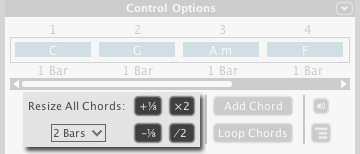
- Use the options in the Resize Chords section. You can either:
- Increase or decrease the size of chord(s) by an1/8th of a bar (see Glossary).
- Double or halve the length of the chord(s).
- Note that these resize transformations apply to every chord unless you have made a selection.
(images interspersed with text above, figure out how to do best)
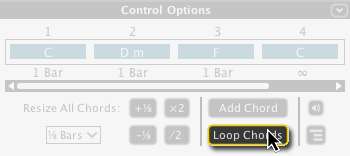
8.3.5 Loop Chords
Click the Loop Chords button to activate the loop region exclusively around the chords that appear in the Chord Overview panel. This is useful when you’re building and / or tweaking a section of your track.
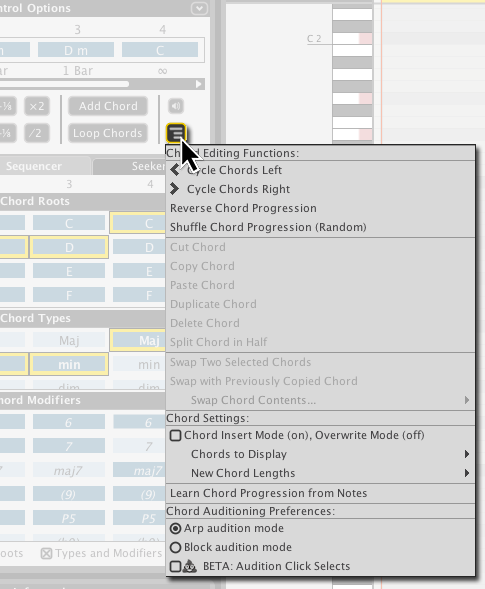
8.3.6 Chord Overview Options
Click the options button in the Chord Overview panel for more controls and customizability.
8.4 Chord Suggester
The Suggester helps you pick the next chord in your progression. It lays out a path for you to follow when playing with chords. It’s perfect for creating chord progressions quickly or experimenting with stuff you might never have made otherwise. For more on how the suggester works, see page 113.
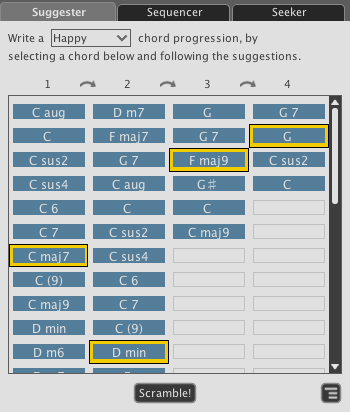
8.4.1 How to use the Suggester
There are two steps to building a chord progression using the Suggester.
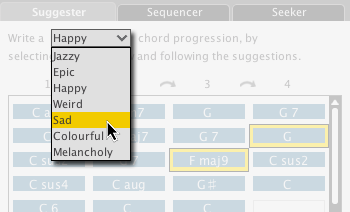
- Choose a mood from the drop-down list.
- Click a chord in the first column to populate the second column with chords. Each chord you select influences the chords in the adjacent column to the right.
(images associated with each step)

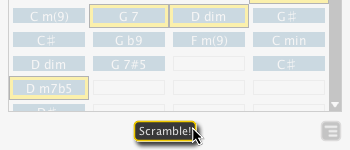
8.4.2 Scramble the Suggester
To add an element of excitement and chance, we’ve added a couple scramble features to the Suggester.
- Click the Scramble button to get a random selection in each column.
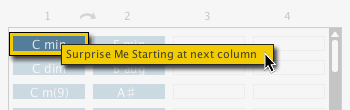
- Right-click a chord and select Scramble from Next Column to get a random result in the adjacent column to the right and onward.
(images associated with each of the above)
8.5 Chord Sequencer
Use the Chord Sequencer to create exactly the chord progression you’re looking for. This panel gives you total control of the chords while allowing you to build chords one part at at time. It’s perfect for programming a progression you already have in your head or if you want to edit something you got using the Suggester or Chord Presets.
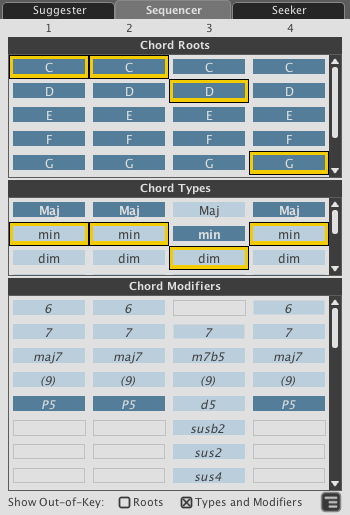
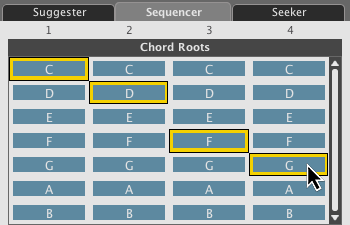
8.5.1 Chord Roots
Every chord has a special note from which the rest of the chord stems. This note is called the Root. Superficially, it’s the first character in the chord’s name. For example, the root of the chord “Em7b5” is “E”.
In the Chord Sequencer, the first part of the chord you select is the root.
- Click a cell in the Chord Roots sequencer to select it.
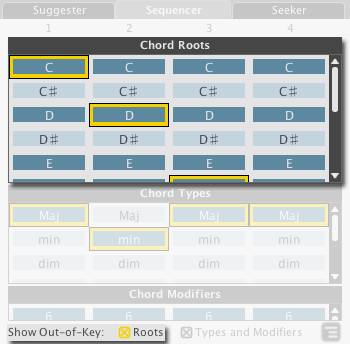
8.5.2 Out-of-Key Root Notes
By default, only notes that are in the chosen key appear in the Roots list. Click the Show Out-of-Key Roots checkbox to show all twelve chromatic tones in the Roots sequencer. Notice that out-of-key (see Glossary) notes are coloured light blue.
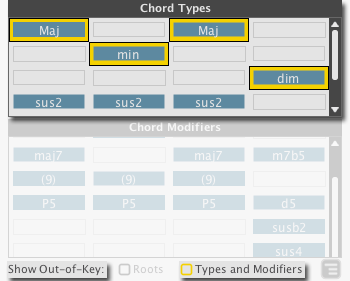
8.5.3 Chord Types
The second part of the sequencer is the Chord Type sequencer. For our purposes, we can also refer to these as Triad Types. Triad types define the quality of the chord: Will it be major, will it be minor, etc? In Liquid Music, we break down Triad types (or Chord Types) into the following categories:
- Major triads
- Minor triads
- Diminished triads
- Augmented triads
- Suspended chords
- Scales
By default, the Chord Type that is in key will be selected. Click any chord type to select it. Note that out-of-key Chord Types appear in light blue.
For more on triad types, see page 114.
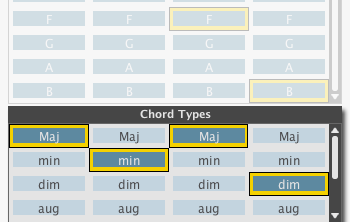
8.5.4 Out-of-Key Chord Types
By default, the Chord Type sequencer displays out of key chord types. This is helpful in guiding you to all the chords that are in key. That said, it also sounds pretty cool to pick the same chord type for all your chords, so be sure to try out this feature!
Click the Show Out-of-Key Types and Modifiers (see page 112) checkbox to toggle this on and off.
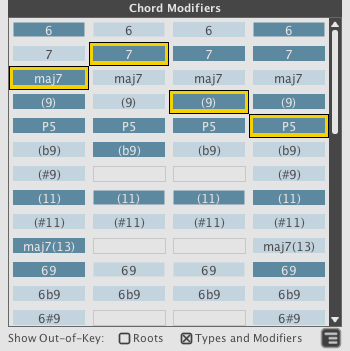
8.5.5 Chord Modifiers
After you have built a chord using the Root and Type sequencers, you can begin to add interesting tensions and colors to those chords using the Chord Modifiers (see Glossary) sequencer. This is a great way to add more notes to the chords you’re using.
As with the Root and Type sequencers, Modifiers that are in key are colored dark blue. Click a cell to add it to your chord. Note that you can only add one cell per column.